Veneering involves adhering thin slices of decorative wood over substrate material to achieve beautiful designs and wood patterns economically. The craft of marquetry takes veneering further by creating intricate artistic imagery from accurately cut veneer pieces. This article explores the veneering process along with advanced marquetry techniques.
Contents:
- Veneer Basics
- Preparing Veneers
- Gluing Options
- Pressure Methods
- Edging Options
- Repairs
- Marquetry Fundamentals
- Cheater Marquetry
- Classic French Marquetry
- Cutting Intricate Designs
Veneer Basics
Veneering taps into wood’s full creative potential for ornamental work at a fraction of the cost of solid lumber options.
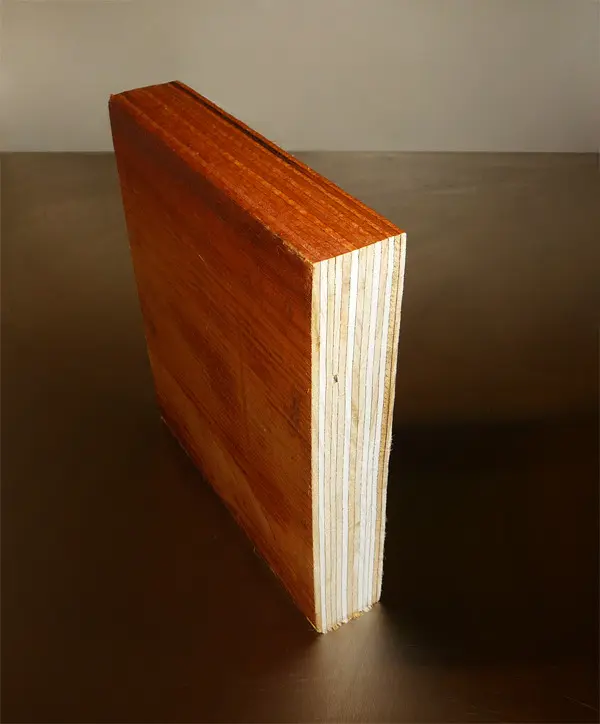
Veneer utilizes very thin sheets of wood adhered over cheaper core stock:
- Veneers range from 1/42″ to 1/16″ thick
- Allows unique and rare wood patterns affordably
- Consistently colored and grained material
- Ideal for decorative surfaces and inlays
- Saves money over solid wood in most applications
Common veneer forms:
- Raw Veneer – Peeled, sliced, or sawn solid wood sheets sold to size and apply yourself
- Reconstituted Veneer – Multiple sliced layers laminated together for dimensional stability
- “Paper-Backed” Veneer – Temporary paper backing makes application easier
Quality veneer work relies upon properly preparing substrates, veneers, adhesives, and pressure methods. For more information on woodworking basics, visit our woodworking basics guide.
Preparing Veneers
Veneers require conditioning and flattening:
- Soak raw leafs in warm water for several minutes until pliable if brittle
- Sand very lightly to smooth surface, especially if applying directly to substrate
- Trim to size allowing several inches excess all around
- Dry between sheets of plywood under weight to flatten overnight
- Tape small cracks on backside using veneer or packing tape
Pre-glue veneer work minimizes the chance of bubbles, gaps, and wrinkles during final assembly. For more tips and tricks for beginners, visit our beginner woodworking tips and tricks page.
Gluing Options
Common veneer adhesives include:
- PVA Glue (#CommissionsEarned) – Regular white/yellow wood glue. Lower cost, longer open time, water clean up. Dries somewhat brittle.
- Hide Glue (#CommissionsEarned) – Traditional warm liquid animal collagen glue. Reversible with heat and moisture. Doesn’t creep from joints.
- Epoxy (#CommissionsEarned)– Very strong and moisture resistant. Long open time but permanent bond. Can yellow over time.
- Contact Cement (#CommissionsEarned) – Brushed or sprayed on. Forms instant grab upon contact. Useful for curved surfaces.
Specialty Veneer Glues – Advanced polymer veneer glues combine strength, flexibility, fast setup, and ease of use. Popular options:
- Titebond Veneer Glue (#CommissionsEarned)
- Wilsonart Adhesive (#CommissionsEarned)
Select moisture resistant adhesives for pieces seeing water exposure. For more information on woodworking tools, visit our woodworking tools page.
Pressure Methods
Applying continual even pressure while adhesive dries prevents veneer bubbles and voids:
- Vacuum Press (#CommissionsEarned) – Uses bagging film and vacuum pump to apply perfectly even 100psi pressure. Ideal for professional veneering.
- Veneer Press (#CommissionsEarned) – Heated metal cold presses squeeze joints at set pressures. Allow doing multiple pieces.
- Veneer Hammer (#CommissionsEarned) – Specialized hand tool generates targeted veneering pressure with integrated heating element.
- Woodworker’s Veneer (#CommissionsEarned) – Thick high quality tape applied over veneer and smoothed down firmly. Provides good compiled amateur results.
- Clamps and Cauls (#CommissionsEarned) – Traditional wood clamps and clamping cauls work for smaller pieces. Requires many clamps.
- Veneer Rollers (#CommissionsEarned) – These rollers press down veneers firmly as rolled across surface, pressing out bubbles. Takes practice.
- Sandbag Press (#CommissionsEarned) – Weighed sandbags layered over an assembly act like a flexible press. Very simple and configurable.
Proper pressure results in strong bonds without thin spots, gaps, cracks, or overlap ridges. For more information on woodworking safety, visit our woodworking safety page.
Edging Options
Veneered plywood edges require aesthetic edging:
- Solid Wood – Glue on solid strips like edge banding to conceal plywood edges
- Matching Veneer – Wrap additional veneer around the sides for seamless appearance
- Banding Tape – Heat activated veneer tape wraps cleanly around edges
- Edge Paint – Specially formulated paints blend faux veneer edges
For a natural integrated look, edge wrap with real wood bandsawn veneer pieces attached using the same adhesive as the face. For more information on woodworking joinery, visit our joinery 101 page.
Repairs
Properly done veneering lasts decades, but damage can occur necessitating touch ups:
- Fill small cracks with thin superglue and re-sand smooth once cured
- Replace bubbles by slicing out affected section and inlaying new veneer piece
- Replace lost veneer on flat surfaces with same species and cut pattern aged and darkened to match
- Refinish abraded spots with additional clear coats to restore damaged color and seal wood pores
- Severely damaged sections may need complete replacing and regluing of new veneer
Take time with veneer repairs to achieve seamless grain and color consistency with the surrounding material. For more information on wood care, visit our wood care guide.
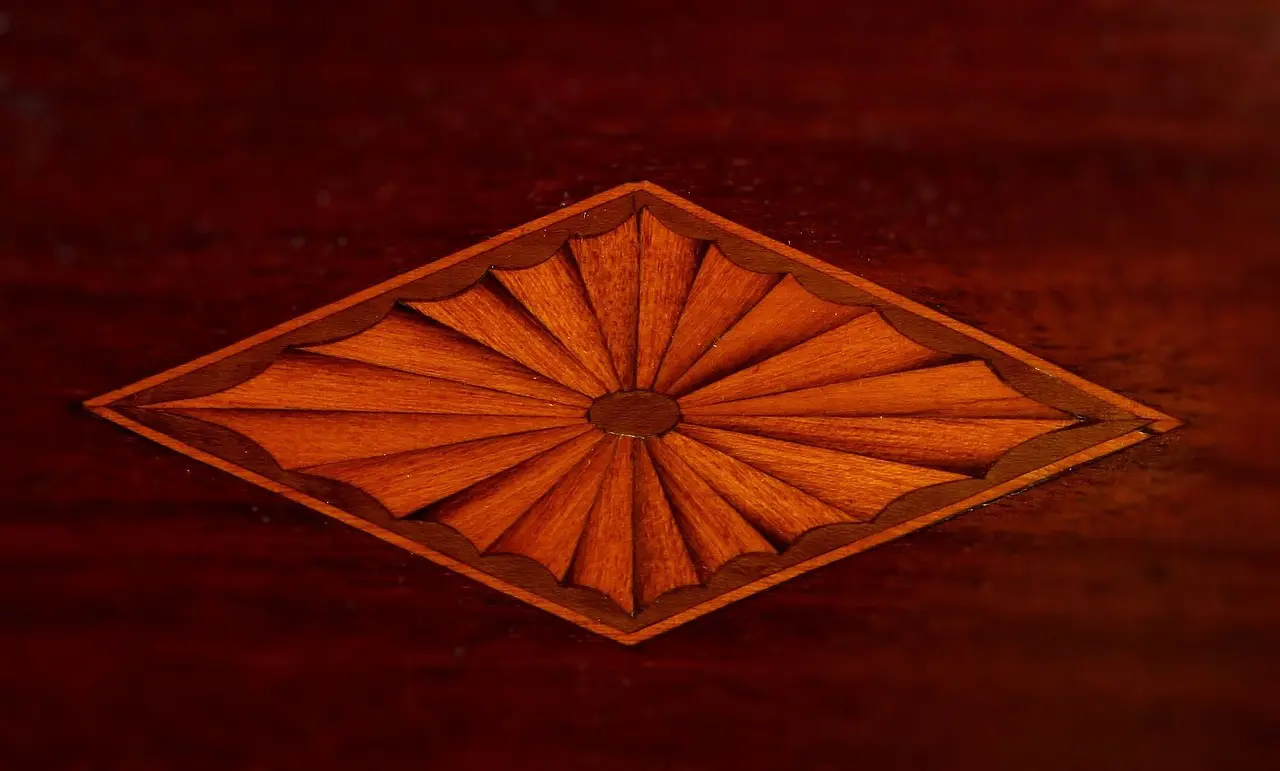
Marquetry Fundamentals
Marquetry takes veneering artistry to an advanced level by forming picturesque scenes from many small pieces:
- Veneers sliced artistically across grain to maximize figuring
- Jigsaw puzzle style assembly from numerous individually cut shapes
- Patterns of flora, landscapes, geometric designs, animals, and more
- Allows veneering complex non-geometric motifs and shapes
- Intricate hand cut veneers shaped using jewelers saws and fine blades
Marquetry requires great precision and infinite patience to cut and assemble such elaborate royal detailing. For more information on wood carving, visit our beginner’s guide to wood carving.
Cheater Marquetry
Simpler faux marquetry using easier techniques:
- Band saw – Roughly cut basic shapes with thin band saw blades
- Laser cutting – Use CAD designs and laser cutter for faster precision
- Veneer sampler packs – Arrange assortments of precut veneer pieces into patterns
- Knife cutting – Cut softer veneers over drawings with sharp craft knives
Produces quasi-marquetry patterns with less time and skill needed. Lacks fine hand cut intricacy. For more information on woodworking projects, visit our most profitable woodworking projects 2023 page.
Classic French Marquetry
Traditional marquetry techniques developed during 17th-18th century furniture craft:
- Double bevel knife cutting with hand pressure along metal straight edge
- Exacting patterns drafted using proportional dividers
- Elements precisely shaded using pieces sawn across matching grain
- Floriate motifs, architectural curves, animals, complex arrangements
- Chessboard assembling for reference while gluing structures together
- Surrounding ornamental veneer borders called crossbanding
A refined skill taking decades of focus to fully master. True marquetry remains painstaking hand work. For more information on woodworking tools, visit our best carpentry tool sets reviews page.

Cutting Intricate Designs
Key steps for executing advanced marquetry:
- Enlarge Pattern – Scale full size drawings using photocopier or overhead projector for reference
- Select Veneers – Choose thin veneers that work well with straight knife cutting. Softer woods easier to shape.
- Make Storyboard – Tape individual pieces to backing in order as a guide for later assembly
- Cut Elements – Use sharp bevel edged knives over pattern lines on veneer with metal straight edge to control curvature
- Add Shading – Create tones using same species cut differently to replicate light effects
- Assemble – Working from storyboard place elements into position using small amounts of hide glue, epoxy, or veneer tapes
- Background Veneer – Background supports marquetry design. May need cuts around elements or overlapping inlays
- Sand and Finish – Fine sand without rounded edges. Finish brings out depths and details.
Marquetry taps the ultimate potential of wood veneers for breathtaking custom artwork. Veneering and marquetry encapsulate woodworking artistry. Mastering the depths of these advanced skills takes patience and dedication but allows realizing awe-inspiring creations. For more information on wood finishes, visit our wood finishes page.
FAQs
Q: What are the main differences between veneers and solid wood?
A: Veneers are very thin sheets of wood from 1/42″ to 1/16″ thick. This allows unique patterns affordably. Solid wood is much thicker and requires more raw material.
Q: Why does veneer need to be prepared before gluing to a substrate?
A: Preparation like sanding, trimming, flattening, and drying minimizes the chances of bubbles, gaps, and wrinkles when finally adhering the veneer.
Q: What types of adhesives work well for attaching veneers?
A: Quality wood glues, epoxy, contact cement, and specialty flexible veneer adhesives all work. Select waterproof glue for surfaces seeing water.
Q: What methods can be used to apply pressure when gluing down veneers?
A: Vacuum bags, presses, veneer hammers, tapes, weighted sandbags, clamps, and rollers are used to provide continuous pressure. This prevents thin spots and bubbles.
Q: How should the plywood edges be finished on a veneered panel?
A: Options include adding edge banding strips, wrapping the raw plywood edges with matching veneer, applying hot melt veneer tapes, or coating edges with blended paints.
Q: What distinguishes marquetry from standard veneering?
A: Marquetry forms artistic pictorial scenes out of many small intricately hand-cut veneer pieces assembled like a puzzle. Standard veneers use larger sheets for surfaces.
Q: What tools are used for precisely cutting marquetry veneer elements?
A: Sharp bevel-edged marquetry knives are used over straight edges on a stack of veneers to accurately cut small detailed shapes by hand. Jewelers saws also work.
Q: How is shading and depth achieved in marquetry artwork?
A: Veneers of the same species are carefully sliced across the grain at different angles to produce darker or lighter tones when reassembled. This replicates lighting and shadows.
Q: What wood species work best for fine marquetry?
A: Tight grained tropical species like mahogany, rosewood, ebony, and boxwood have been traditionally used. They cut cleanly but any wood can be used with care.
Q: What final steps complete a marquetry project?
A: Once assembled, light final sanding and applying a clear finish really make the intricate patterns pop visually. The finish also protects against wear and moisture.

