Table of Contents
- Varnish Overview
- Step-by-Step Varnish Application
- Oil-Based Varnish Advantages
- Water-Based Varnish Advantages
- Shellac Uses
- Step-by-Step Shellac Application
- Lacquer Benefits
- Spraying Lacquer Technique
- Comparing Varnish, Shellac, Lacquer
- Recommended Wood Finish Uses
- FAQs
Varnish Overview
Varnish is renowned for its superb durability and water resistance. Options include:
- Polyurethane: Tough synthetic resin forms flexible, durable coatings. Withstands moisture, impacts, and abrasion. Polyurethane varnish is available in gloss, satin, and matte sheens. Oil-based polyurethane provides the best moisture resistance. Water-based is lower odor and cleans up with water but is less moisture resistant.
- Marine Spar Varnish: Specialized varnish formulated for outdoor wood projects like boats, exterior doors, and outdoor furniture. Contains UV inhibitors to resist sun damage. Provides excellent protection from water and weathering. Gloss or satin finishes available.
- Tung Oil Varnish: Varnish made from renewable tung oils derived from nut seeds. Offers decent protection from moisture and spills. Provides a warm, slightly golden natural sheen. Typically used on finer interior wood furnishings.
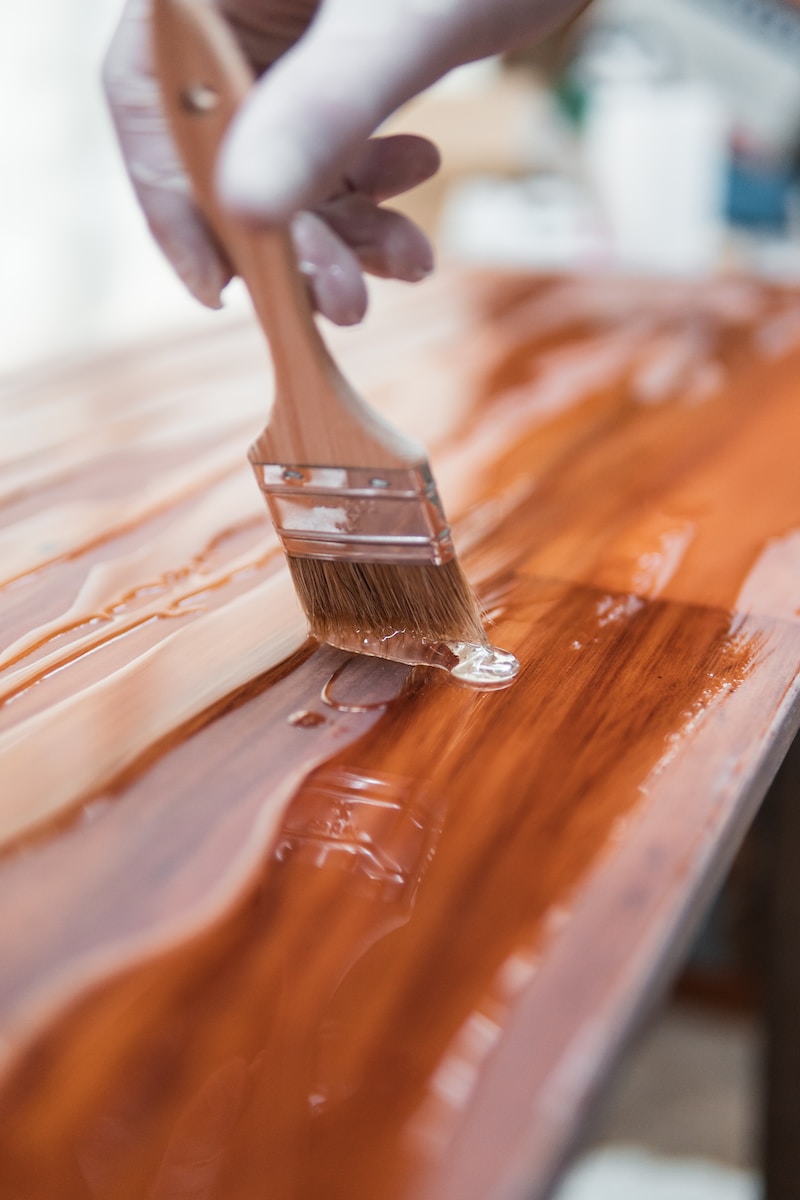
Step-by-Step Varnish Application
Follow these detailed varnish application tips:
- Carefully stir varnish rather than shaking the container to uniformly mix and avoid creating bubbles. Stir periodically during use.
- Apply varnish using high-quality natural bristle brushes or foam brushes designed for varnish. Avoid cheap brushes that could shed bristles.
- Maintain a wet edge and make long continuous strokes following the wood grain to minimize visible brush marks. Work quickly but smoothly.
- Thin the varnish sparingly with manufacturer-approved solvents if necessary for better flow and brushability. Too much thinning reduces protection.
- For optimal protection and appearance, apply multiple thin coats of varnish rather than fewer heavy coats. Lightly sand between coats with 280-320 grit sandpaper to improve adhesion.
- Closely follow label directions for drying time between varnish coats. Cool humid conditions may require longer drying times. Rushing recoats can cause cloudiness.
- Apply at least three coats for adequate protection on horizontal surfaces like tabletops and four coats for very high wear items.
Oil-Based Varnish Advantages
- Cures to a harder, more moisture-resistant, and durable finish compared to water-based varnish.
- Can be used for exterior wood projects needing weather resistance.
- Flows out very smoothly for an ultra-high gloss, glass-like finished surface appearance.
Water-Based Varnish Advantages
- Low odor makes it suitable for indoor use on all types of projects.
- Water cleanup of tools and brushes rather than harsh solvents.
- Very fast drying time allows recoating after just 2-3 hours typically.
Varnish delivers unbeatable protection and durability to wood projects. Take time to apply multiple coats carefully and smoothly.
Shellac Uses
Shellac is a classic wood finish that has been used for centuries. It is derived from secretions of the lac beetle. Key traits:
- Dries rapidly to a smooth, warm natural sheen from 1-3 pound cuts.
- Enhances and saturates the natural beauty of varied wood grain patterns wonderfully.
- Easy to apply and repair later by simply applying additional fresh layers which melt into previous.
- Alcohol-based so has a strong odor requiring ventilation when applying.
- Adds a light amber tone to wood, ranging from nearly clear to dark garnet.
Shellac has numerous versatility advantages making it a useful component in any finisher’s toolkit:
- Seals odorous resinous woods like pine and cedar effectively to contain sappy aromas.
- Creates non-grain raising filler base coats for permanently covering scratches, knots, stains, etc. before final finishing.
- Blocks stains from water, smoke, ink, and more from bleeding into subsequent topcoats.
- Provides reasonably good moisture resistance while allowing wood to breathe naturally when used as a complete finish.
Step-by-Step Shellac Application
- Purchase pre-mixed shellac or mix powdered flakes into denatured alcohol to make liquid shellac in 1-3 pound cuts.
- Typically apply using a high-quality natural bristle brush or with a lint-free rag.
- Seal any knots, sap streaks, or wood defects thoroughly with a 2-3 pound cut first coat to prevent staining or discoloration bleed under finishes.
- To build a finish coat, apply multiple thin layers of 1-2 pound cut shellac for best clarity and protection.
- Shellac dries remarkably quickly allowing recoating every 20-30 minutes typically. This allows quickly building layers.
- Use wax-free or de-waxed shellac for the final coats when desiring a polished rubbing effect.
Shellac can be used by itself as a complete but light-duty finish, or combined as a seal coat when its odor-blocking and stain-resisting abilities are needed. It brings out the inherent beauty of wood grain patterns.
Lacquer Benefits
Lacquer has been used since the early 20th century to create ultra-smooth, crystal clear, durable wood finishes. Advantages of lacquer include:
- Very fast drying once sprayed allowing applying multiple build coats in a single day.
- Produces ultra-smooth glass-like surface sheen when spray applied optimally.
- Excellent moisture resistance and moderate chemical resistance for a protective finish.
- Available in clear gloss, satin, colored, and specialized custom formulations.
- Minimal chance of yellowing from UV light when cured.
Spraying Lacquer Technique
Proper spray technique is crucial to achieve flawless results with lacquer:
- Thin lacquer to optimal viscosity for sprayer and conditions if needed – lacquer is typically pre-thinned for spraying but may need adjustment.
- Apply lacquer using a dedicated high-quality lacquer spray system – HVLP spray gun with moisture trap, inline filter, 1.3-1.5mm nozzle, etc.
- Spray initial light mist coats first to establish base clarity without drips before applying heavier wet coats.
- Overlap spray passes 50% while maintaining a consistent wet edge to prevent visible lap marks or thickness variations.
- Allow proper drying time between coats as specified on manufacturer directions – usually 10-30 minutes. Fogging means recoating too soon.
- Consider gently rubbing with ultra-fine 600-1000 grit sandpaper between coats to remove dust nibs and create an ultra-smooth finish.
- Allow lacquer to cure fully for 7-14 days after applying the final coat before exposing to liquids or abrasion.
Properly sprayed lacquer creates stunning crystal clear, deep, smooth wood finishes. Using a filtered spray booth and safety gear is mandatory when spraying flammable lacquers.
Comparing Varnish, Shellac, Lacquer
| Finish | Varnish (#CommissionsEarned) | Shellac (#CommissionsEarned) | Lacquer (#CommissionsEarned) |
|---|---|---|---|
| Base | Resin oils/synthetics | Insect secretion | Nitrocellulose polymers |
| Sheen | Gloss to matte | Medium gloss | Ultra-high gloss |
| Protection | Excellent abrasion/moisture resistance | Moderate moisture resistance | Excellent moisture resistance |
| Color | Crystal clear or warm amber cast | Adds light amber tone | Crystal clear |
| Dry Time | Slow drying – hours | Very fast drying – minutes | Extremely fast drying – minutes |
| Application | Brushing, wiping | Brushing, padding | Spraying |
| Repairability | Can recoat damaged areas | Fresh coats melt into previous | Difficult to spot repair |
| Fume Safety | Low odor solvents, water clean up | Strong alcohol evaporation – ventilate | Highly flammable – use spray booth |

Recommended Wood Finish Uses
- Varnish: Fine furniture, cabinetry, boats, premium outdoor projects.
- Shellac: Sealing odorous exotic woods, knot sealing, stain blocking isolation coats.
- Lacquer: High wear items like tabletops, flooring, cabinets needing toughness.
With practice, varnish, shellac, and lacquer can each be mastered to provide exquisite clear wood finishes. Always closely follow all safety directions. For more woodworking tips see:
- Woodworking Safety
- Sanding and Prepping Wood
- Types of Wood Finishes
- DIY Wood Projects
- Kids Woodworking
Varnish, shellac, and lacquer all have specific advantages for different finishing needs. Learn the unique strengths of each classic finish and how to apply them smoothly for long-lasting protection and beauty on wood projects.
FAQs
Q: What are some benefits of using varnish on wood projects?
A: Varnish provides excellent protection against moisture, spills, abrasion, and UV damage. It produces durable crystal clear or warm finishes. Polyurethane varnish makes wood projects highly water-resistant.
Q: How should polyurethane varnish be applied for the best results?
A: Stir thoroughly before applying using high-quality natural bristle or foam brushes. Maintain a wet edge and brush smoothly with the grain. Allow proper drying times between multiple thin coats. Lightly sand between coats for maximum adhesion.
Q: What types of projects is spar varnish well suited for?
A: Marine spar varnish contains UV inhibitors that make it ideal for coating and protecting exterior wood projects like outdoor furniture, front doors, window boxes, garden planters, etc.
Q: What are some unique uses for shellac as a sealer or finish?
A: Shellac is commonly used to seal odorous wood like pine and cedar, prevent staining on knots, isolate old finishes from new coats, and quickly build non-grain raising sealers for covering defects before final finishing.
Q: Should shellac be applied using a brush or a rag?
A: Shellac can be applied using either a high-quality natural bristle brush or a clean lint-free rag. Thin coats are best to retain clarity and prevent drips. Rags allow rubbing in thin even coats.
Q: Why is lacquer an ideal finish for tabletops and flooring?
A: The ultra-smooth, durable, moisture-resistant finish lacquer provides when sprayed makes it well suited for high wear surfaces like dining tables and kitchen counters that will encounter spills, hot pans, and abrasion.
Q: What safety steps should be taken when spraying lacquer?
A: Always spray in a properly ventilated spray booth or tent outdoors. Wear an Organic Vapor respirator and protective gear. Avoid all ignition sources due to lacquer‘s high flammability. Allow full curing time before use.
Q: How long does varnish take to fully cure compared to shellac or lacquer?
A: Varnish takes the longest time to fully harden and cure – up to 2 weeks generally. Shellac cures very quickly while lacquer reaches full cure in approximately 7-14 days.
Q: Which finish provides the smoothest possible surface – varnish, shellac, or lacquer?
A: Lacquer that has been sprayed properly, sanded smooth between coats, and allowed full curing time will result in the absolute smoothest possible surface compared to wiping varnish or shellac.
Q: What preparation should be done before applying these clear wood finishes?
A: Ensure the wood is freshly sanded very smooth, all dust removed with tack cloths, appropriate conditioners/sealers applied if needed, and moisture content suitable for the finish. This prevents defects trapping under the coating.
Check out our guide on the differences of finishes more indepthly here