Transform a space by installing wood paneling on lower walls and ceilings. Includes planning and installation.
Outline
- Introduction
- Planning the Components
- Tools and Materials Needed
- Preparing Walls
- Cutting and Installing Frames
- Applying Beadboard or Planks
- Finishing Touches
- Planning for Ceilings or Curved Walls
- Coping with Obstacles
- Costs and Considerations
- Conclusion
- FAQ
Introduction
Wainscoting refers to the decorative wood panels lining the lower portion of interior walls. Often paired with beadboard accents, wainscoting can lend traditional elegance and visual interest to any room. From choosing styles to prepping walls and installing boards, this article will cover the complete process for DIYers to beautifully transform rooms with wainscoting and beadboard finishes. If you are new to woodworking, you might want to check out this beginner woodworking tips and tricks to get started.
Planning the Components
Traditionally, wainscoting capped baseboard trim and acted as a protective wall covering. Today it primarily serves decorative purposes. Consider the style of room when deciding on panel dimensions and layout:
- Chair rails: horizontal trim separates upper and lower wall sections. Lowers typically get paneled.
- Beadboard: thin spaced boards with grooved vertical lines create pattern and shadows.
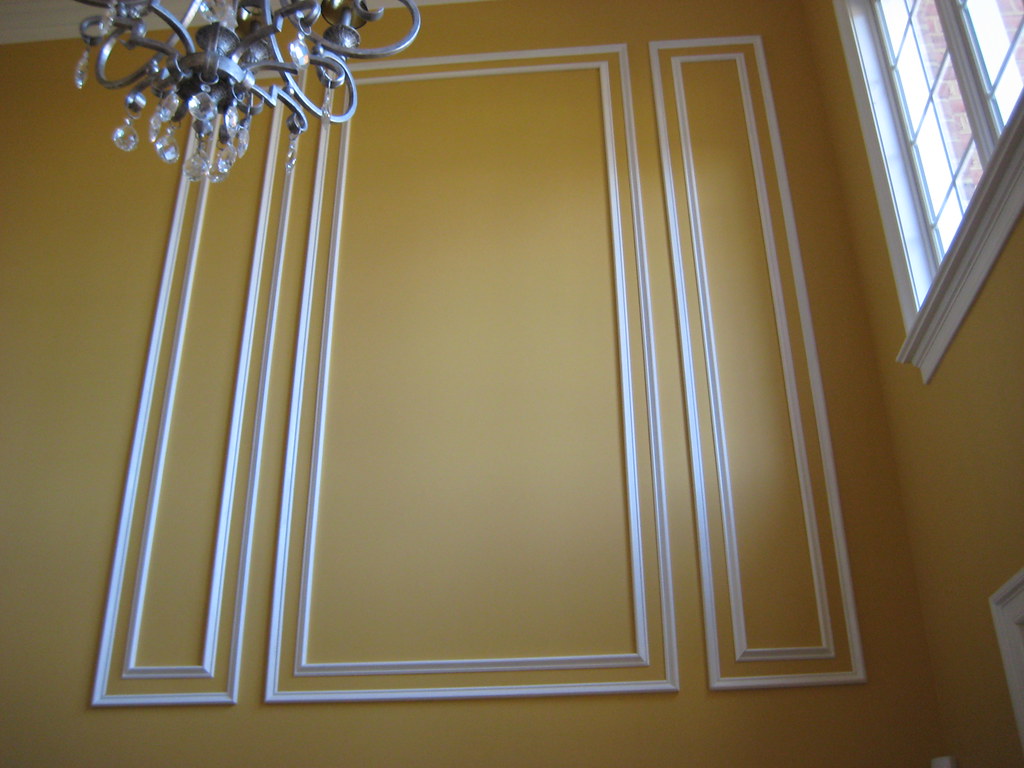
- Raised panels: square or rectangle mouldings create framed sections. Paneled wainscoting has framing around recessed boards.
- Planks: wide solid boards create rustic textures. Shiplap and tongue-and-groove add dimensional interest.
Mock up the wall layout with painter’s tape to visualize effects before purchasing materials. Account for doors, windows, and wall elements in planning the wainscoting design. Also, understanding different wood types and their uses can be very helpful in this stage.
Tools and Materials Needed
- Boards: beadboard, v-groove, shiplap, or solid wood planks in desired style
- Chair rail, baseboard, backband moulding (framing)
- Wood glue, nails/screws, fasteners
- Levels, tape measure
- Table saw, miter saw, jigsaw, nail gun, drill
- Wood filler, putty, stain/paint and brushes
Moisture-resistant MDF board avoids warping. Wide planks may use more costly solid woods like poplar, oak, or pine. Calculate linear feet of each component to buy sufficient supplies. Rent tools if needed. If you are looking for tool recommendations, here are the best carpentry tool sets reviewed.
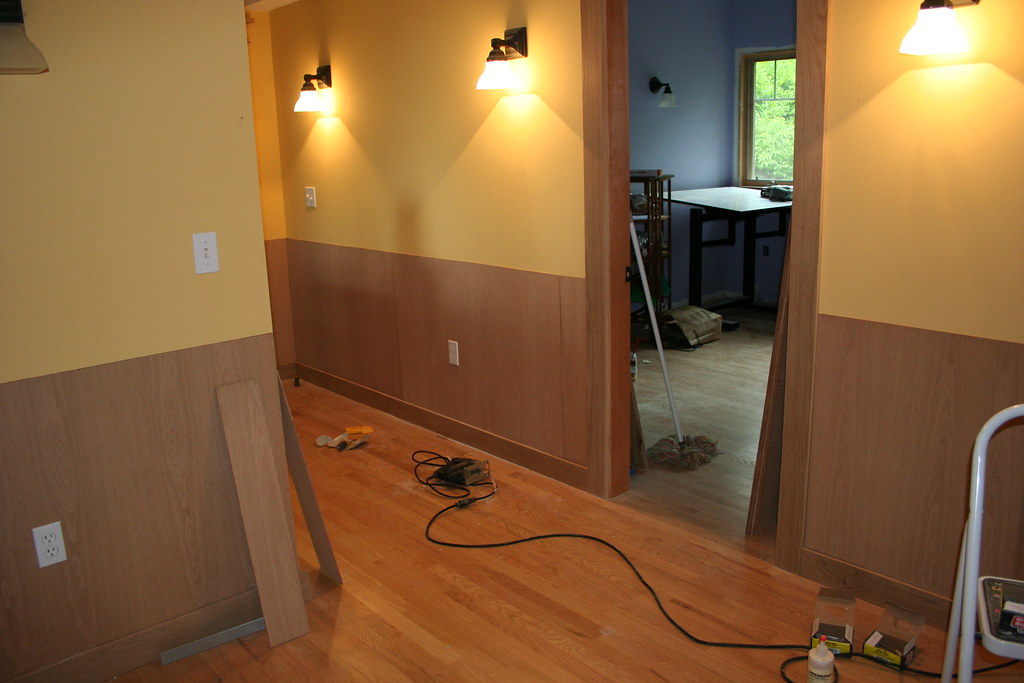
Preparing Walls
Wainscoting installation requires secured, smooth substrate walls. Eliminate wallpaper, debris, and protrusions. Fill any cracks, holes, and imperfections with spackle and sand smooth. Prime and paint walls, allowing to fully dry before wainscoting installation. Make sure to follow the essential safety measures in woodworking during this process.
If paneling will only cover walls partway, use painter’s tape to mark off the height for a level guideline. Check for plumb walls with a level and address any areas out of square. Install back blocking between studs where nail attachment is needed.
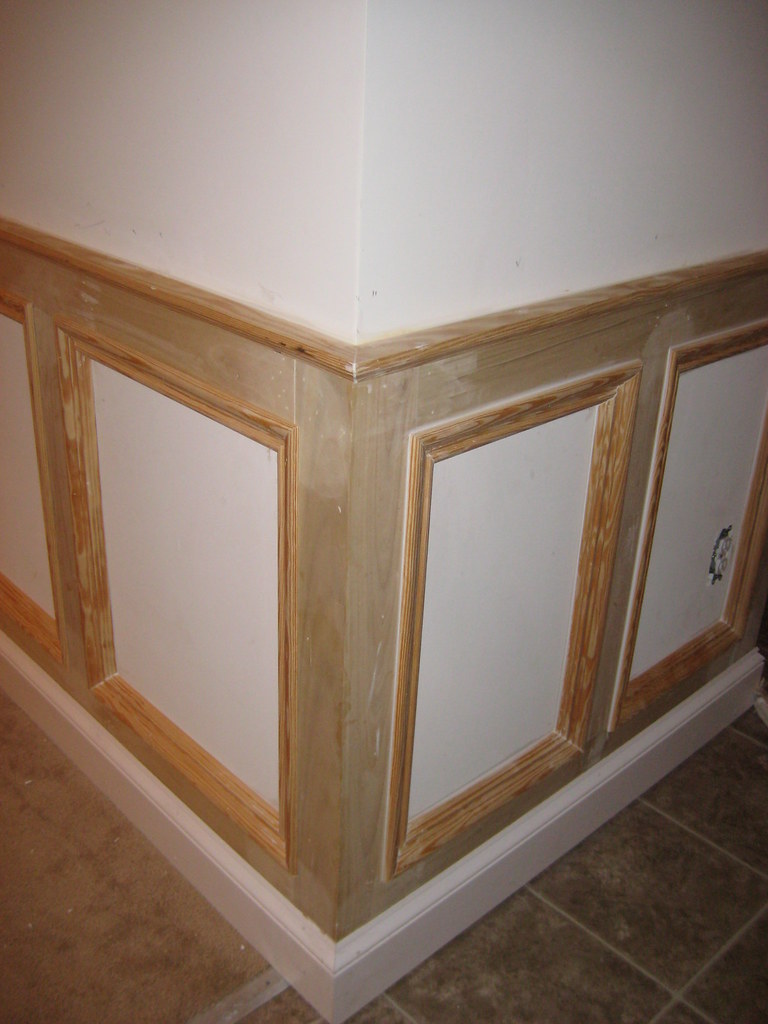
Cutting and Installing Frames
For paneled beadboard or plank wainscoting, first install the horizontal chair rail and vertical stiles framing each panel section. Cut moulding pieces to length with precise 45-degree mitered corners. Drill pilot holes to prevent wood splitting. Set baseboard trim.
Use a level and spacers to install chair rail evenly across all walls. Attach stiles connecting corners. For raised panels, frame openings then fit and glue or nail recessed panels within. Leave 1/8-inch gaps for expansion between panel pieces. Countersink nail heads and fill holes for a smooth finish.
Applying Beadboard or Planks
Before installing the decorative wainscoting, lay out boards on the floor to arrange placement of longer pieces, color variations, or symmetrical patterns. Number boards on the back for an assembly map.
Apply construction adhesive to walls and press boards into place with joints fitting tightly together. Stagger beadboard butt joints across rows. Use pneumatic nailers, screws, or glue and clamps for a sturdy finished application. Trim boards around corners and edges with a miter saw for custom fits.
Finishing Touches
Complete the install by reattaching original baseboard trim or adding new shoe moulding at the bottom edge of wainscoting. Countersink all nails, putty any defects, and sand for a smooth surface. Apply wood filler and caulk at joints or seams as needed before your choice of paint, stain, whitewash, or other finishes. For more information on finishes, check out this guide on different wood finishes and how to apply them.
Lightly sand again and wipe clean after finishing for a smooth painted or stained surface over both existing drywall and new wainscoting. Finally, reinstall wall plates, lighting, hardware, and any removed decor. Step back and admire the beautiful new vertical interest and dimension added with wainscoting accents.
Planning for Ceilings or Curved Walls
The techniques above apply to flat walls, but wainscoting can also provide gorgeous coffered details on ceilings or curved staircases. Plan panel layouts and curved cuts carefully through drawings and measurements or by making cardboard templates. Number precut pieces so the ceiling application goes in sequence. Use adhesive and screws for overhead installation strength.
Coping with Obstacles
The main challenges when adding wainscoting are corners, uneven existing walls, obstructions like radiators or pipes, and varied ceiling heights. Inside and outside corners may need custom corner post moulding for proper finishes. Shims, deeper baseboards or additional framing pieces can work around uneven wall surfaces. Make precise cuts around protrusions through the paneling. Adapt rail and stile heights as needed for non-standard ceiling heights.
Costs and Considerations
Wainscoting installation costs range from $6-50 per square foot depending on the materials and complexity of the chosen style. Using pre-primed boards and quality materials helps the project go smoothly. The proper tools, safety precautions, patience, and attention to detail will achieve professional looking results. Consider hiring contractors if in doubt about the skills needed. But when done properly, wainscoting creates elegance and sophistication in any space.
Conclusion
Adding wainscoting and beadboard paneling lends a room gorgeous architectural detail. With careful pre-planning and installation of decorative wood boards and trim pieces, this relatively straightforward upgrade yields amazing visual impact. Transform plain spaces into rooms with vintage character, rustic textures, or refined sophistication with quality wainscoting projects.
FAQ
Q: What are the main styles of wainscoting boards?
A: Beadboard, raised panels, planks, shiplap, tongue-and-groove. Each creates different visual interest on walls.
Q: What length boards should be used?
A: Full wall height pieces minimize seams. Standard beadboard lengths are 8 to 10 feet. Use scarf joints to extend boards.
Q: How is wainscoting framed?
A: Chair rail molding goes horizontally at top. Vertical stiles create panel sections. Baseboards or base caps finish the bottom.
Q: What tools are needed for installation?
A: Table saw, miter saw, jigsaw for cutting. Level, nail gun, drills, pry bar and glue for attaching boards.
Q: What’s the best way to prepare walls?
A: Fix imperfections, prime and paint. Mark layout lines. Install back blocking if needed between studs.
Q: Should wainscoting go over existing drywall?
A: Yes, it attaches over drywall or plaster for easiest installation. New framing isn’t necessary.
Q: How should inside and outside corners be handled?
A: Use corner posts or mitered joints. Coping saws cut profiled edges for custom trim at corners.
Q: What technique attaches boards most securely?
A: Construction adhesive combined with finish nails, brads, or screws creates a strong permanent bond.
Q: How do you work around uneven walls or ceilings?
A: Use shims or furring strips to compensate. Vary top rail and stile heights to account for differences.
Q: Can wainscoting be painted or stained?
A: Yes, apply your choice of finishes over primed boards once fully installed for built-in look.